
As the leaves begin to fall and the scent of pumpkin spice fills the air, I can’t help but feel the excitement of Halloween creeping in. This season always brings a delightful opportunity to dive into the kitchen and whip up some spooktacular treats that kids will adore. Enter my Halloween Graveyard Pudding Treat Cups—an easy, no-bake creation that perfectly blends fun and festivity.
Picture this: vibrant layers of neon-colored pudding topped with crunchy cookie “dirt” and decorated with adorable gummy worms or candy gravestones. These whimsical cups not only captivate the eyes but also offer a delightful mix of textures that will have little hands reaching for more. Plus, they can easily be prepared in advance, leaving you worry-free to enjoy the festivities with family and friends. So grab your favorite spooky decorations and get ready to create a treat that’s sure to be a hit at your Halloween gathering!

Why will you love Halloween Graveyard Pudding Treat Cups?
Easy and Fun: With no baking involved, these treats delight kids while requiring minimal effort in the kitchen.
Visually Stunning: Bright pudding layers topped with crunchy cookie “dirt” make for an eye-catching dessert that’s perfect for Halloween festivities.
Textural Variety: Combining smooth pudding with crunchy toppings and chewy gummies creates an irresistible mix that kids can’t resist.
Make Ahead: Prepare these spooky cups in advance, allowing you to focus on enjoying the Halloween fun with loved ones without any last-minute stress.
Customizable: Decorate with a variety of themed candies or use different color combinations for unique creations that match your Halloween style!
Halloween Graveyard Pudding Treat Cups Ingredients
For the Pudding
- Instant Pudding Mix – Use chocolate or vanilla for a tasty base; opt for chocolate to enhance the “dirt” effect.
- Milk – Needed to prepare the pudding; always use cold for the best consistency.
- Neon Food Coloring – Adds vibrant hues to the pudding; mix colors for a festive touch.
For the Topping
- Chocolate Cookies – Crush them for “dirt”; Oreos work best for their flavor and color.
- Gummy Worms – Perfect for crawling out of the “grave”; they’re an elastic option and look fun!
- Candy Gravestones – Great for decoration; choose chocolate or cookie gravestones for added flair.
For Assembly
- Clear Plastic Cups – Displays the layers beautifully; make sure they’re sturdy enough to hold the pudding.
- Spoon – Use a wide spoon for easy layering; this will help create the perfect presence in the cups.
These Halloween Graveyard Pudding Treat Cups will surely enchant kids with their festive charm and fun flavors!
How to Make Halloween Graveyard Pudding Treat Cups
-
Prepare the Pudding: In a mixing bowl, whisk together the instant pudding mix and cold milk according to the package instructions. Stir in neon food coloring to achieve vibrant colors, making each layer festive and fun.
-
Layer the Pudding: Using clear plastic cups, start by adding a layer of pudding to the bottom. Use a wide spoon to create an even layer, ensuring a beautiful presentation.
-
Add More Layers: Alternate layers of pudding in different colors, filling the cups about three-quarters full. The vibrant hues will make your treat cups visually stunning and inviting for the kids.
-
Top with “Dirt”: Crush chocolate cookies into fine crumbs and sprinkle generously on top of the last pudding layer. This represents the “dirt” of the graveyard, adding a delicious crunch.
-
Decorate: Carefully insert gummy worms and place candy gravestones on top of the cookie “dirt.” This adds an adorable yet spooky touch, perfect for Halloween fun!
-
Chill and Serve: Place the completed cups in the refrigerator for at least 30 minutes to set. This gives the pudding time to firm up and keeps everything cool and refreshing.
Optional: Add a sprinkle of colorful sprinkles for extra flair before serving.
Exact quantities are listed in the recipe card below.

Make Ahead Options
These Halloween Graveyard Pudding Treat Cups are perfect for meal prep, allowing you to enjoy stress-free festivities! You can prepare the pudding and layer it into clear plastic cups up to 24 hours in advance; just make sure to cover them tightly with plastic wrap to prevent any skin from forming on the pudding. The crunchy cookie “dirt” can also be prepared ahead of time—simply crush the cookies and store them in an airtight container at room temperature. When you’re ready to serve, just sprinkle the cookie crumbs on top and add your adorable gummy worms and candy gravestones for that finishing touch. This way, you’ll have a delightful dessert ready to impress little ghosts and goblins without last-minute chaos!
How to Store and Freeze Halloween Graveyard Pudding Treat Cups
Fridge: Keep these pudding cups covered in the refrigerator for up to 3 days. Use airtight containers or plastic wrap to prevent them from absorbing odors.
Freezer: While it’s best to avoid freezing the pudding cups as they can lose texture, you can freeze the pudding layers separately for up to a month. Thaw overnight in the fridge before reassembly.
Reassembly: If you’ve frozen the pudding layers separately, layer them in cups with crushed cookies and decorations just before serving to maintain their festive appeal.
Make Ahead: These treats can be prepared in advance, making them a great option for your Halloween gatherings.
What to Serve with Halloween Graveyard Pudding Treat Cups?
As you prepare for a spooktacular Halloween gathering, consider these delightful treats that will complement your festive pudding cups perfectly.
-
Monster Mummy Hot Dogs: These fun and savory treats wrapped in crescent dough provide a delicious balance to the sweet desserts. Kids will love the spooky presentation and the tasty flavor.
-
Witch Hat Cookies: A sweet addition featuring fudge-striped cookies topped with chocolate kisses. They are not only adorable but complement the fun theme of your Halloween party!
-
Ghostly Popcorn: Light and crunchy, this sweet popcorn mix with white chocolate drizzles adds a delightful contrast to the creamy pudding cups. Perfect for little fingers!
-
Spooky Cheese and Cracker Platter: Offer some savory bites with Halloween-themed cheeses, perfectly balanced with crunchy crackers, for a fun contrast against the sweet treats.
-
Gummy Candy Bowl: Fill a bowl with assorted gummy candies for a fun, free-for-all snack. Kids will munch happily as they dive into both sweets and chewies!
-
Apple Slices with Caramel Dip: A refreshing and healthy option, the tartness of fresh apple slices with sweet caramel offers a nice contrast to the rich pudding and sugary treats.
-
Decorative Halloween Drinks: Create spooky punch with neon colors to match the pudding, perhaps with floating gummy worms or plastic spiders for an eye-catching touch.
-
Freaky Fruit Skewers: Colorful fruit skewers featuring a mix of seasonal fruits as a light, fresh option that balances well with the rich dessert cups. Perfect for little hands!
-
Mummy Pizza Bites: Savory bites topped with strips of cheese mimicking bandages. These delightful snacks are a fun twist and great for kids, providing something hearty alongside the sweet treats.
With these fun pairings, your Halloween menu will be a hit and will create a joyous atmosphere for family and friends!
Expert Tips for Halloween Graveyard Pudding Treat Cups
- Layer Wisely: Keep your pudding layers even to create a stunning visual effect; use a wide spoon for smooth application.
- Crush Finer: Ensure your chocolate cookies are crushed into fine crumbs for the best “dirt” effect; larger pieces may not adhere well.
- Chill Time: Don’t rush! Allow at least 30 minutes of refrigeration for the pudding to set properly, ensuring delightful flavors and textures.
- Gummy Worm Placement: Insert gummy worms right before serving to keep them fresh and prevent them from sinking into the pudding layers.
- Vibrant Colors: Don’t hesitate to mix neon food coloring shades for enticing hues; a variety of colors will be more appealing to kids.
- Prep Beforehand: Prepare the dessert in advance to minimize last-minute stress; these cups can be made the day before your Halloween festivities!
Variations & Substitutions for Halloween Graveyard Pudding Treat Cups
Get ready to unleash your creativity with these fun twists that will make your spooky pudding cups even more exciting!
- Non-Dairy Pudding: Use coconut or almond milk with dairy-free pudding mix to cater to lactose-intolerant friends without sacrificing taste.
- Flavor Swap: Experiment with butterscotch or caramel pudding for a unique flavor profile that compliments the “dirt” topping beautifully.
- Gluten-Free Option: Substitute gluten-free cookies for the chocolate “dirt” to ensure everyone can enjoy this festive treat.
- Alternative Toppings: Swap gummy worms for sour gummy spiders or other spooky-themed candies for an additional spooky factor.
- Presentation Variations: Use Halloween-themed jars or small pumpkins instead of cups for a fun, seasonal presentation that will wow the kids!
- Layered Fruit: Add a layer of diced fruits like bananas or strawberries between pudding layers for a refreshing twist and added nutrition.
- Sweet Spices: Sprinkle a touch of cinnamon or pumpkin spice over the top before serving for an autumnal flavor boost that’s perfect for Halloween.
- Chocolate Shell: For a richer flavor, drizzle melted chocolate over the crushed cookies before adding decorations to create a delicious chocolate crust.
These variations are not only easy but also provide fun options to personalize each cup and cater to different tastes. Enjoy making these spooky treats even more memorable!

Halloween Graveyard Pudding Treat Cups Recipe FAQs
What kind of pudding mix should I use?
You can use either chocolate or vanilla pudding for your Halloween Graveyard Pudding Treat Cups. I recommend using chocolate for a more authentic “dirt” effect, giving a spooky and tasty base for your layers.
How long can I store the pudding cups?
Store the pudding cups covered in the refrigerator for up to 3 days. Make sure to use airtight containers or cling film to prevent odors from seeping in. This way, you can prepare them ahead of time without losing their deliciousness!
Can I freeze pudding layers for later use?
While it’s best not to freeze the assembled pudding cups as they may lose texture, you can freeze the pudding layers separately for up to 1 month. Thaw them overnight in the fridge when you’re ready to assemble your spooky cups!
Advertisement
What if my pudding layers don’t set properly?
If your pudding hasn’t set, ensure you’re using the right ratio of milk to pudding mix—usually, it’s 2 cups of cold milk per box of pudding mix. Whisk the mixture vigorously and let it sit without disturbance for at least 5 minutes. If it’s still too runny, it may need more chilling time.
Are there allergy considerations I should be aware of?
Absolutely! Check for allergies related to any specific ingredients like pudding mix or gelatin in certain candy decorations. For nut allergies, always verify that your cookies and chocolates are nut-free. There are plenty of alternatives available; just read labels carefully!
Can I customize the decorations?
Definitely! Feel free to swap out gummy worms for other candy, like gummy spiders or marshmelon candies, or try using different cookie types for the “dirt.” The more creative, the better—personalize the Halloween Graveyard Pudding Treat Cups to make them your own!
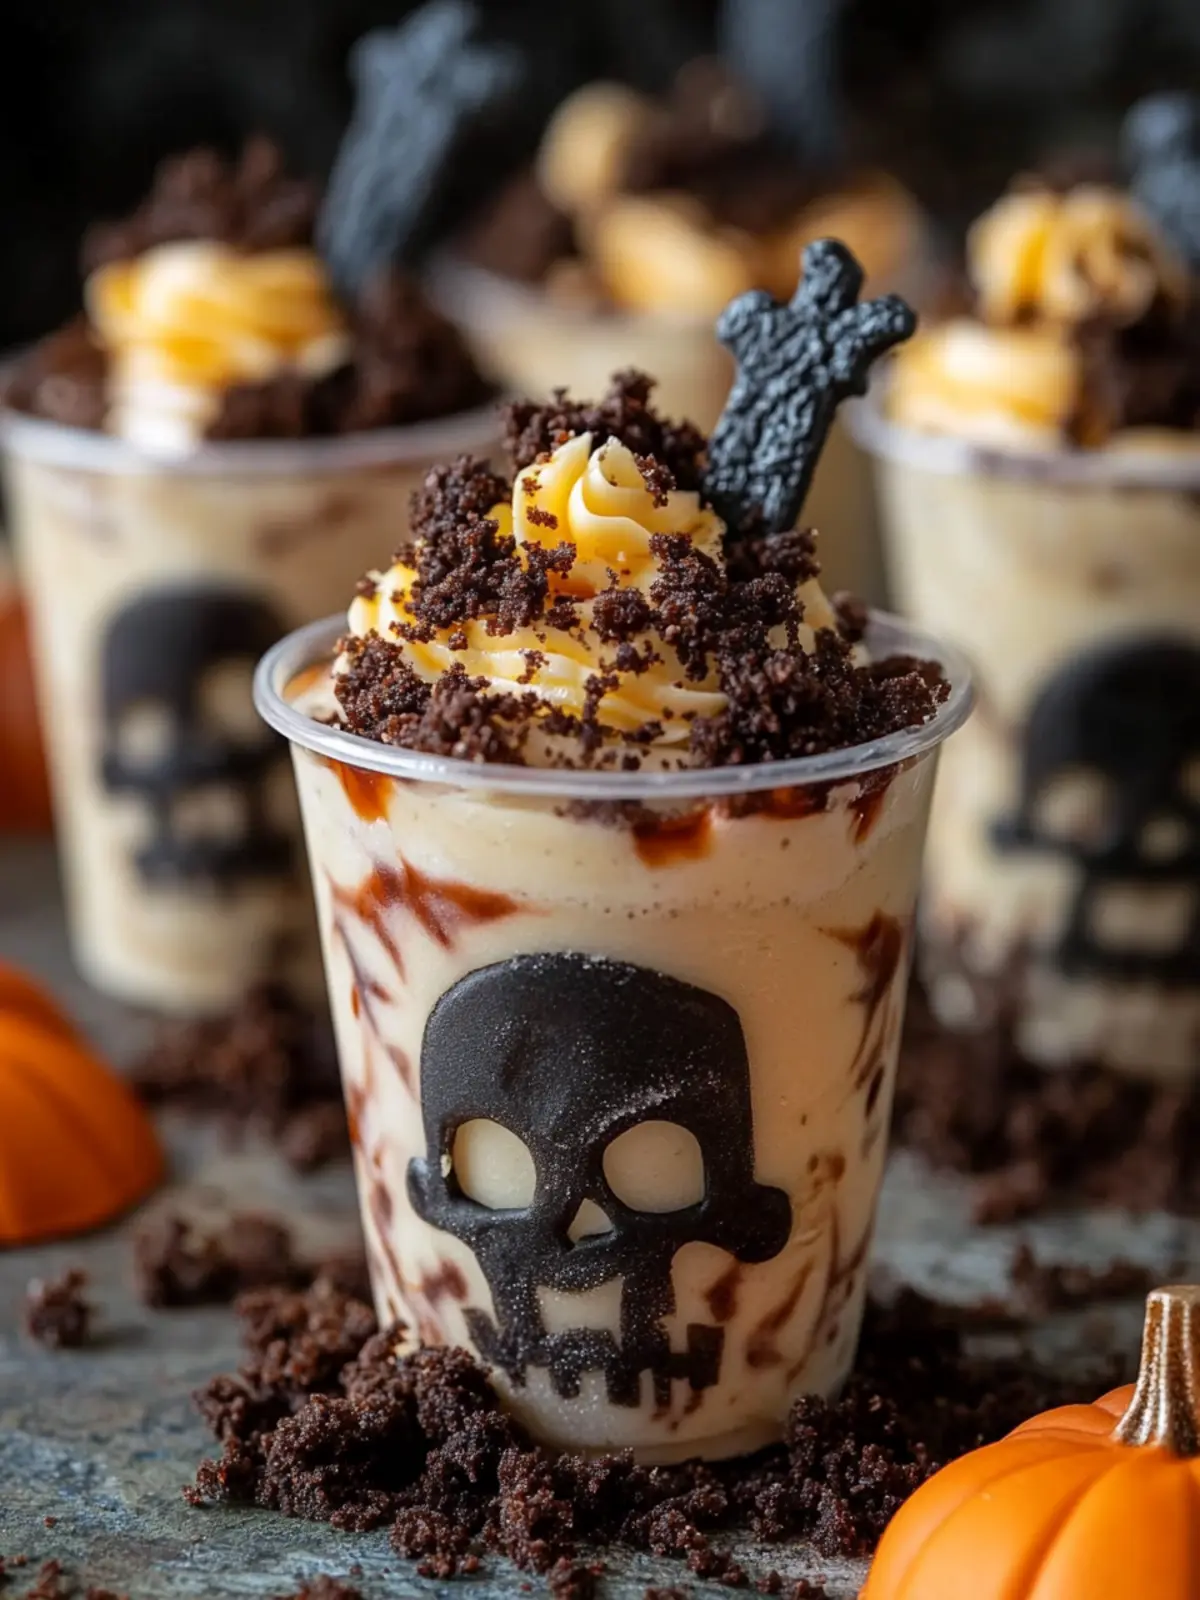
Halloween Graveyard Pudding Treat Cups That Kids Will Love
Ingredients
Equipment
Method
- In a mixing bowl, whisk together the instant pudding mix and cold milk according to the package instructions. Stir in neon food coloring to achieve vibrant colors.
- Using clear plastic cups, start by adding a layer of pudding to the bottom. Use a wide spoon for an even layer.
- Alternate layers of pudding in different colors, filling the cups three-quarters full.
- Crush chocolate cookies into fine crumbs and sprinkle on top of the last pudding layer.
- Insert gummy worms and place candy gravestones on top of the cookie crumbs.
- Place the completed cups in the refrigerator for at least 30 minutes to set.